
21 DIY Outdoor Halloween Decorations for Under $100
Executive Summary
Halloween yard decor doesn’t need expensive animatronics or complicated tools. Every project below can be built in an afternoon or less with materials from a hardware store, craft store, or your own garage — most ideas cost under $15, and the whole yard comes together for well under $100 as of 2026.
Nearly all of these builds are weather-proofed for October rain and wind, the rental-friendly picks use removable fasteners to protect your deposit, and the lighting tricks run on battery power so no outdoor outlet is needed. You’ll also find no-carve pumpkin options and genuine step-by-step instructions for each project.
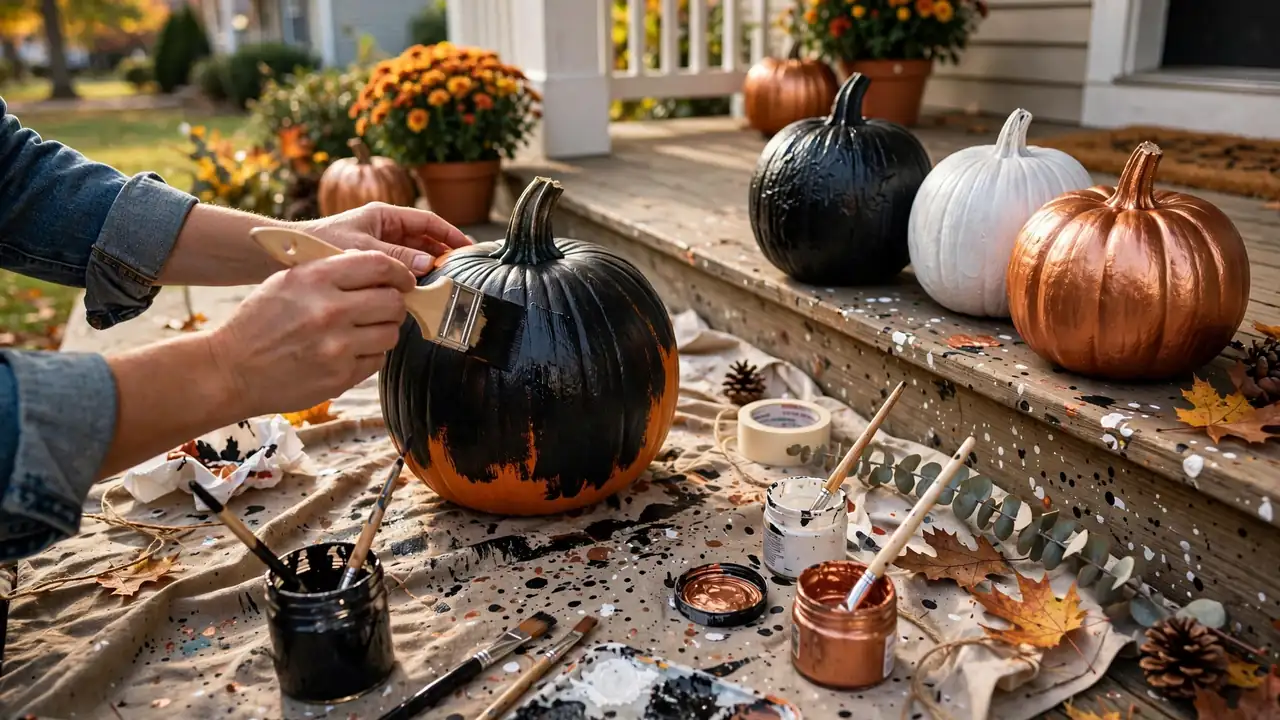
In short: You can build a fully decorated, weather-proof Halloween yard for under $100 with 21 beginner-friendly DIYs — painted and drilled pumpkins, pallet tombstones and ghosts, tin-can luminaries, a giant spiderweb, a monster door, and floating cheesecloth ghosts — using basic hand tools, removable fasteners, and battery lights.
Spooky Silhouettes
Silhouette decor is the fastest way to look Halloween-ready from the street. Black shapes against a lit porch read instantly, even to passing drivers.
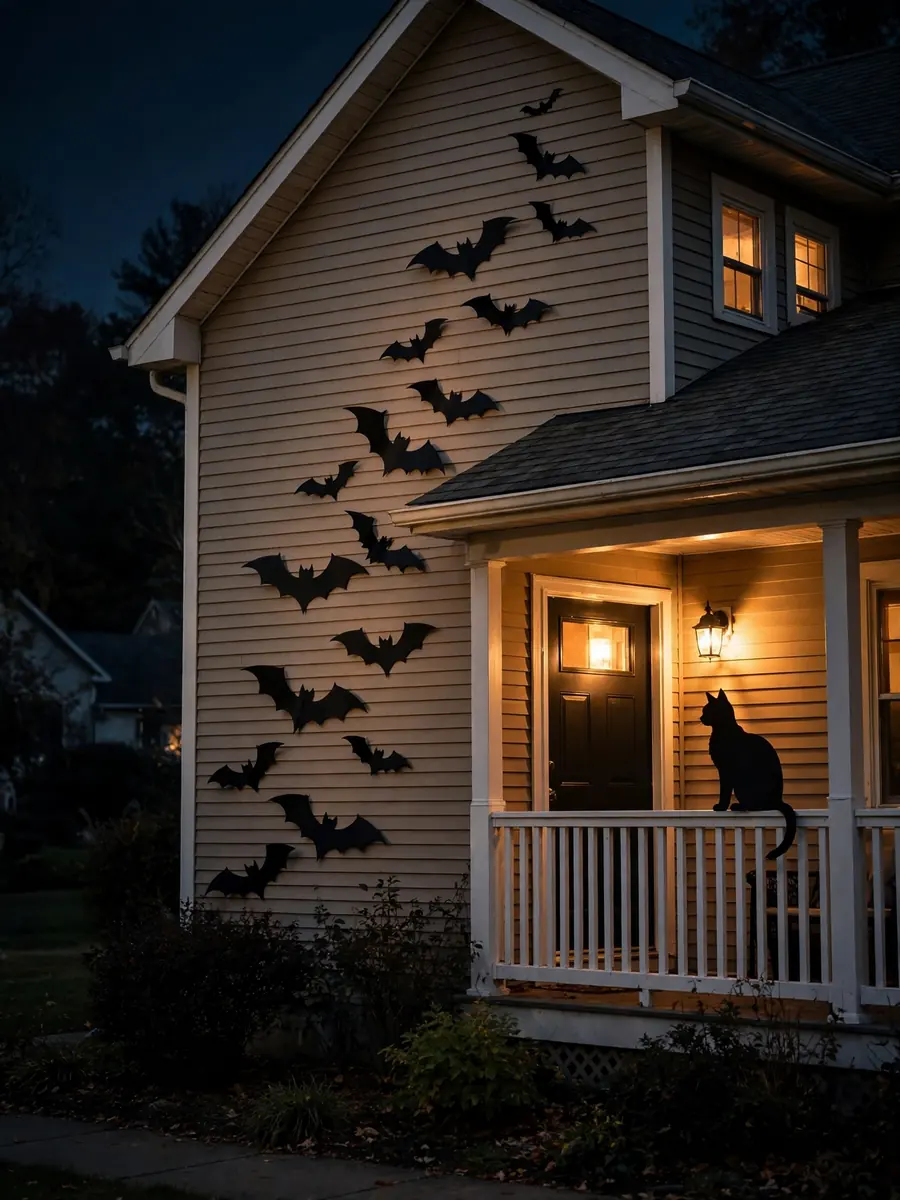
1. Black Cat Cutouts on the Porch Railing
Trace an arched-back cat silhouette onto black foam board, cut it out, and perch it along railings, steps, or a pumpkin stack. Anchor it with a clothespin clipped to the railing so wind doesn’t carry it off. Cost: About $3–$6 for foam board as of 2026. Weather-proofing: Foam board handles light rain; bring cutouts in during heavy storms since wet cardboard warps.
2. A Bat Swarm Climbing the Siding
Cut 20–30 bat shapes from black cardstock (fold, draw half a bat on the fold, cut once for symmetry) and stick them up the siding in a loose trail, as if flying away from a window or pumpkin. Use removable adhesive strips — tape and staples mark siding, so this is the rental-safe method. Cost: About $5 as of 2026. Weather-proofing: Thin craft foam costs slightly more but survives rain far better than cardstock.
3. Witch Silhouette in a Front Window
Cut a witch-on-broomstick shape from black poster board, tape it inside a front window with painter’s tape, and backlight it with a lamp or battery string lights. The glowing silhouette does all the work. Cost: About $4–$8 as of 2026. Weather-proofing: Fully indoor, so any climate works.
No-Carve Pumpkin Projects
Carved pumpkins rot fast and attract fruit flies. These no-carve ideas last all month — and you can still eat or compost the pumpkins afterward.
4. Painted Pumpkin Stacks
Paint pumpkins in matte black, white, and one accent like sage green or copper, then stack in threes on steps, mixing heights for a designer look. Apply two thin coats of outdoor acrylic and let dry between coats. Cost: About $8–$15 total as of 2026. Weather-proofing: Foam pumpkins from the craft store are the weather-proof, reusable option; cheap craft paint peels in rain, so use outdoor-rated paint on real pumpkins.
Pallet Graveyard Builds
Pallet wood gives a cemetery that perfect crooked, weathered look — for free. One or two pallets make the whole scene.
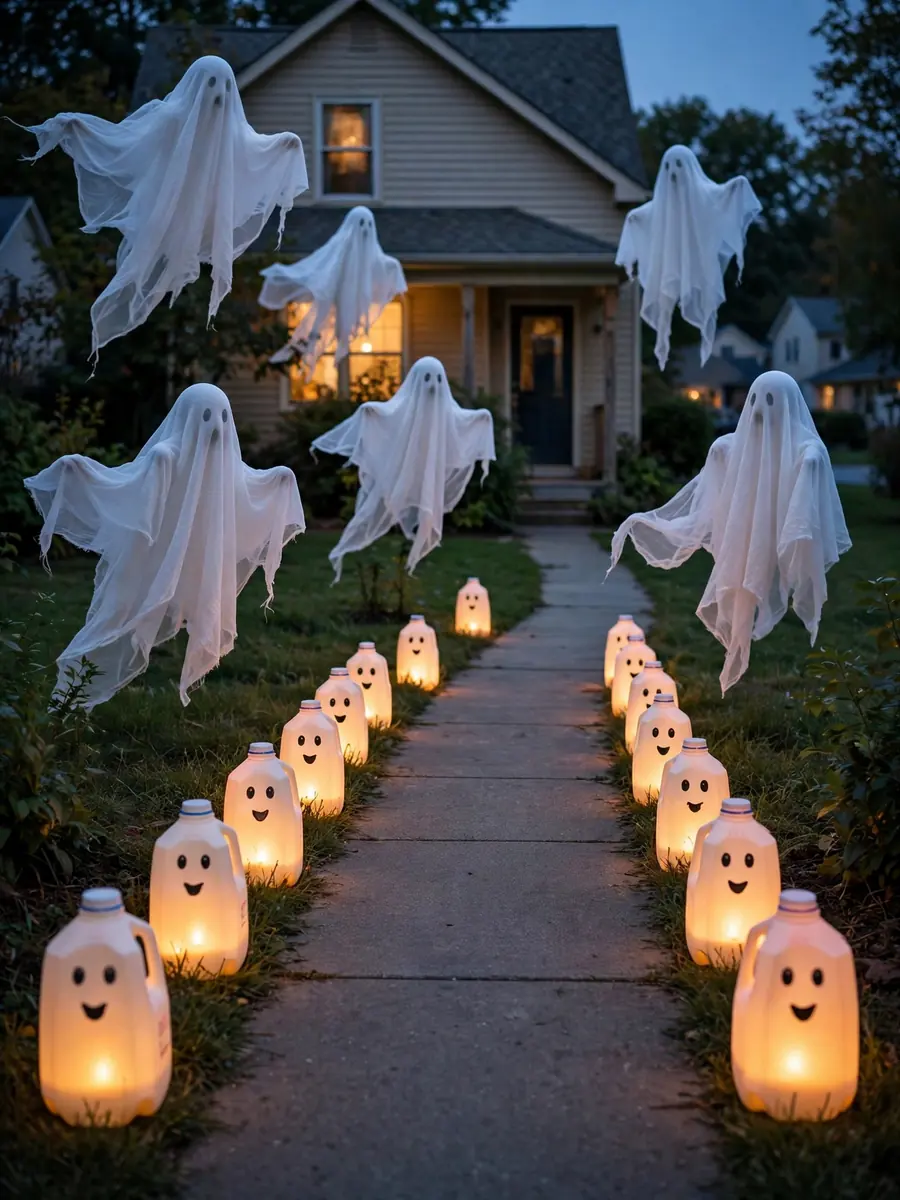
5. Cheesecloth Floating Ghosts
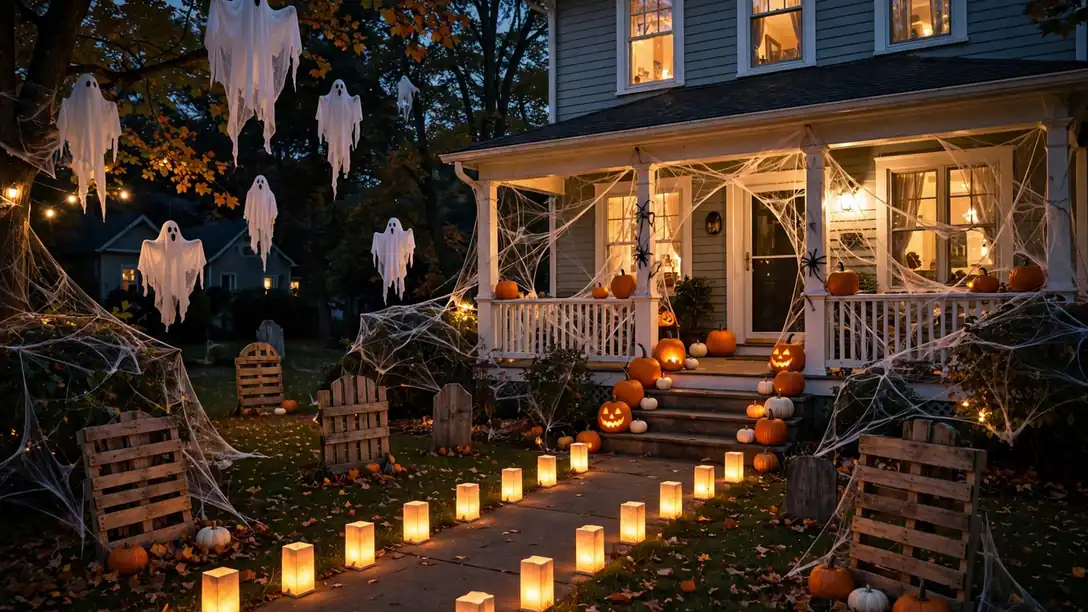
Set a foam ball on a tomato cage, drape two to three layers of cheesecloth over it, tie black yarn around the “neck,” and stick the cage legs in the ground or a planter. Add a battery tea light at the base for a nighttime glow. Cost: About $4–$7 per ghost as of 2026. Weather-proofing: Cheesecloth dries fast in rain; bring ghosts in during high winds since cages can topple.
6. Milk-Jug Ghost Walkway
Rinse white milk jugs, cut a flap in the back, slide in a battery tea light, and draw simple faces with permanent marker. Line both sides of the walkway about two feet apart. Kids love drawing the faces. Cost: Free if you save jugs; about $8–$12 for tea lights as of 2026. Weather-proofing: Jugs are waterproof by design — one of the most weather-proof ideas here. Add gravel inside if your street is windy.
7. Pallet Ghost Fence Pickets
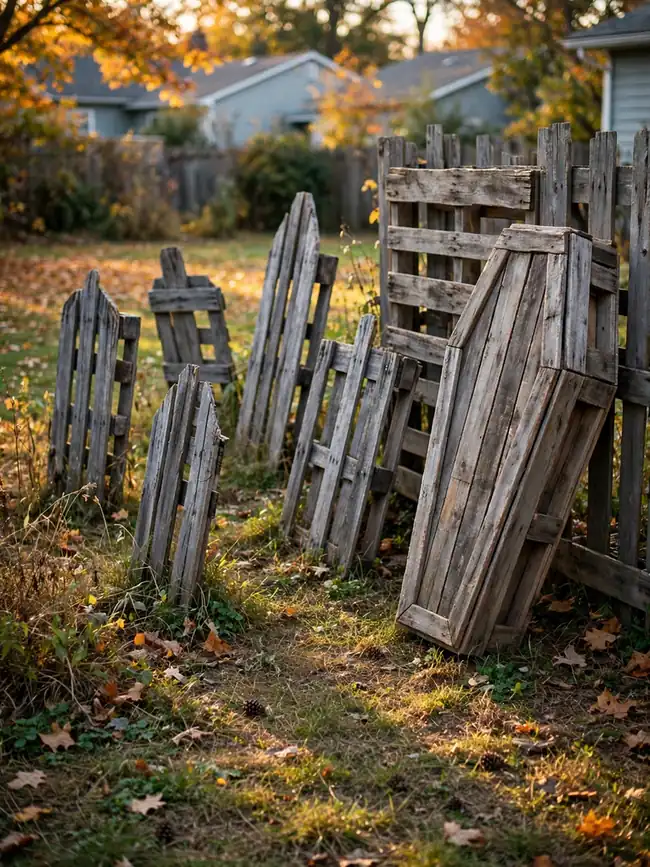
Pry a few slats from a free pallet (pallets are usually free at hardware and garden stores), sand the edges, paint white with outdoor paint, and add oval eyes and an “O” mouth. Push into soft ground or zip-tie to garden stakes along the walkway. Cost: Free to about $6 for paint as of 2026. Weather-proofing: Outdoor paint is essential — raw pallet wood grays and splinters in one rainy season.
Pallet Graveyard Builds
Lighting turns daytime crafts into a nighttime haunting. Both luminaries below work with battery light or real flame.
8. Crooked Pallet Tombstones
Cut pallet boards 18–24 inches tall, round the tops with a jigsaw or sandpaper, and paint gray with darker shading. Add playful “RIP” dates with a black paint pen, then screw each stone to a pointed stake pushed deep in the lawn so wind can’t knock it flat. Cost: Free to about $8 for paint as of 2026. Safety note: Wear gloves with pallets; choose heat-treated boards (stamped “HT”) and avoid “MB” chemically treated ones.
9. Pallet Wood Coffin
Lay six pallet boards in the classic coffin taper — wider at the shoulders, narrower at the feet — screw two cross-braces across the back, and stain dark. Rough is fine; it looks better that way. Lean it against the porch with a dollar-store skeleton hand draped over the edge. Cost: Free to about $10 for screws and stain as of 2026. Safety note: Keep it clear of the trick-or-treat path so nobody trips after dark.
10. RIP Corner Fence
Set two 3-foot stakes four feet apart, zip-tie pallet slats horizontally across with small gaps, and hang a hand-painted “RIP” sign with twine. Lean it slightly — crooked reads spookier. Cost: About $5–$10 as of 2026. Weather-proofing: Zip ties hold up in October weather; re-tighten after storms.
Pathway & Porch Lighting
Lighting turns daytime crafts into a nighttime haunting. Both luminaries below work with battery light or real flame.
11. Tin-Can Luminaries
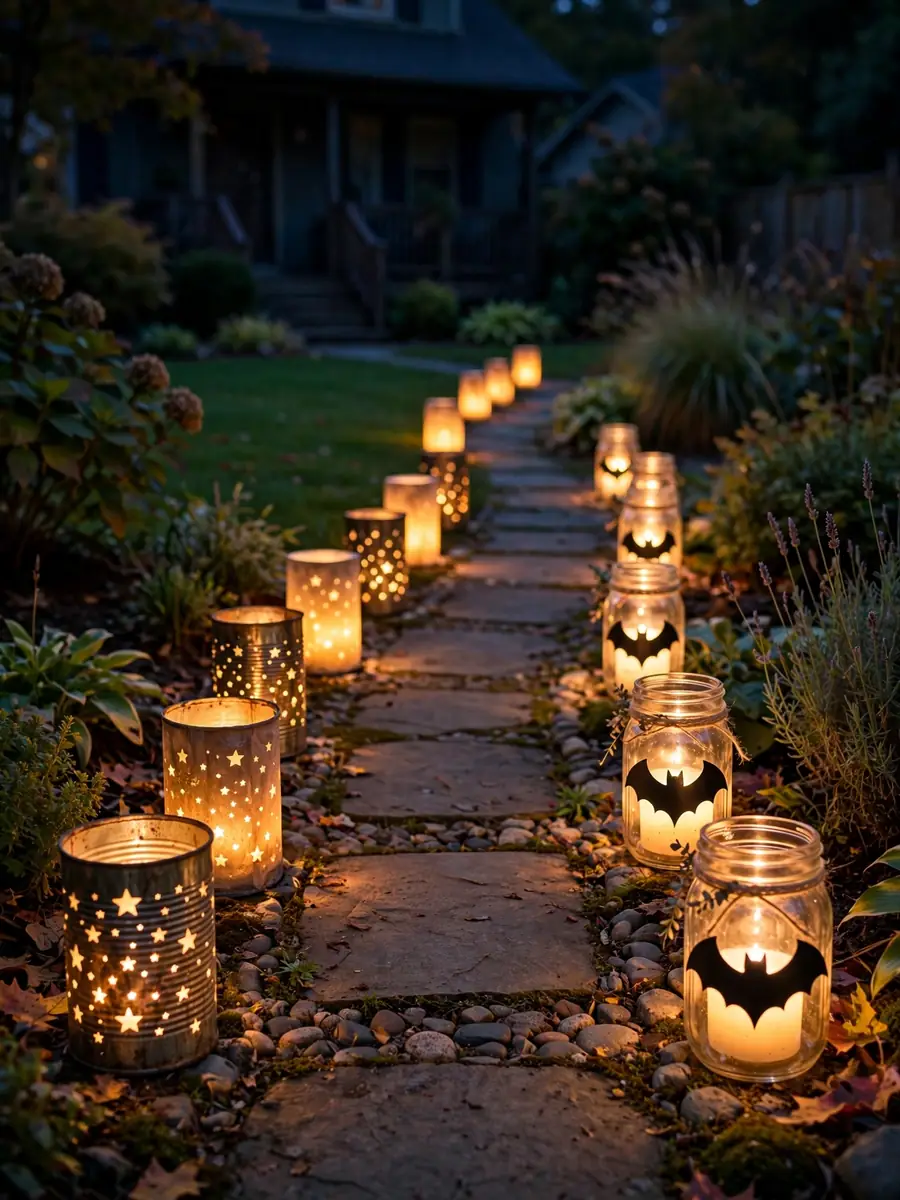
Fill empty tin cans with water and freeze solid so the metal doesn’t dent, then hammer a nail through in star or spiral patterns. Thaw, dry, paint if you like, and drop in battery tea lights — or real tea lights on a non-flammable surface. Cost: Free to about $8 as of 2026. Outdoor-safety note: With real candles, keep cans on concrete or stone — never dry leaves or wooden steps — and blow them out before bed. Battery lights remove the risk entirely.
12. Mason-Jar Porch Lanterns
Stick black bat, cat, or witch cutouts on clean mason jars and drop in battery tea lights. Hang from shepherd’s hooks with wire or cluster on the steps. Cost: About $10–$15 for jars and lights as of 2026. Weather-proofing: Keep under the porch overhang or tip out rain — open jars collect water fast.
Spiderweb & Creature Corners
One giant web becomes the photo spot of the whole display — maximum scare per dollar.
13. Giant Yard Spiderweb
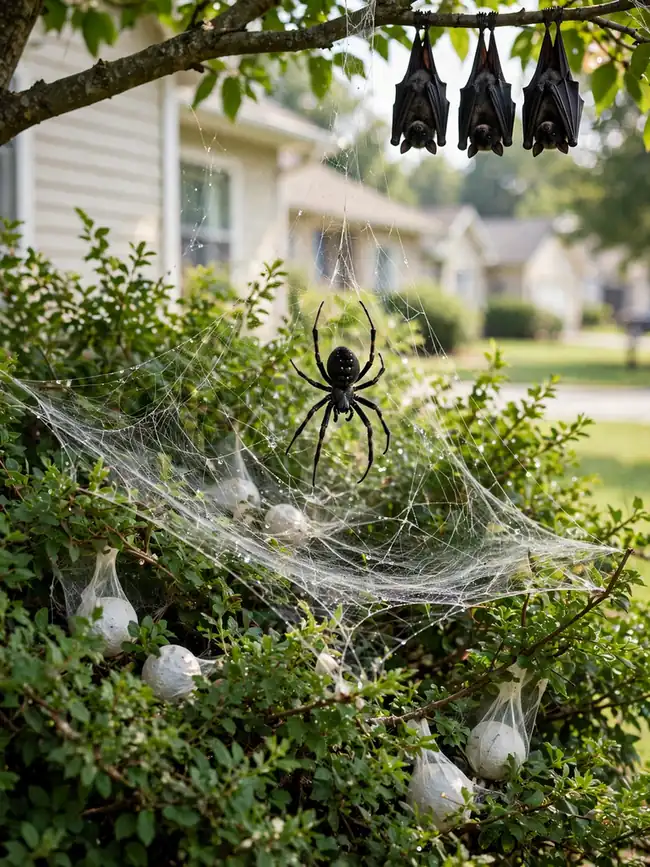
Tie clothesline between two anchors (porch post to tree, or across a bush), run radial lines from a center point, and weave a spiral around them. For the spider, stuff a black trash bag with newspaper, make eight legs from black pool noodles or stuffed pantyhose, and hang it with fishing line. Cost: About $8–$12 as of 2026. Weather-proofing: Clothesline survives rain; check anchor knots after windy nights.
14. Spider Egg Sacks in the Bushes
Stuff cotton batting into old pantyhose legs, tie into round sacks, and hang in bushes and porch corners with fishing line. Add a few plastic spiders on the webbing around them — genuinely creepy for pennies. Cost: About $5–$8 as of 2026. Weather-proofing: Batting dries quickly; replace truly soggy sacks — they’re cheap enough to be disposable.
15. Hanging Bats from the Tree
Cut 18-inch bat shapes from black trash bags, fold wings slightly for dimension, and hang upside down from tree branches with fishing line at varying heights. They sway and spin in the breeze — the movement is half the effect. Cost: About $3–$5 as of 2026. Weather-proofing: Trash-bag bats are fully waterproof.
Monster Door & Window Scenes
The front door is every trick-or-treater’s focal point. Dress it like a character and the whole house feels intentional.
16. Monster Door
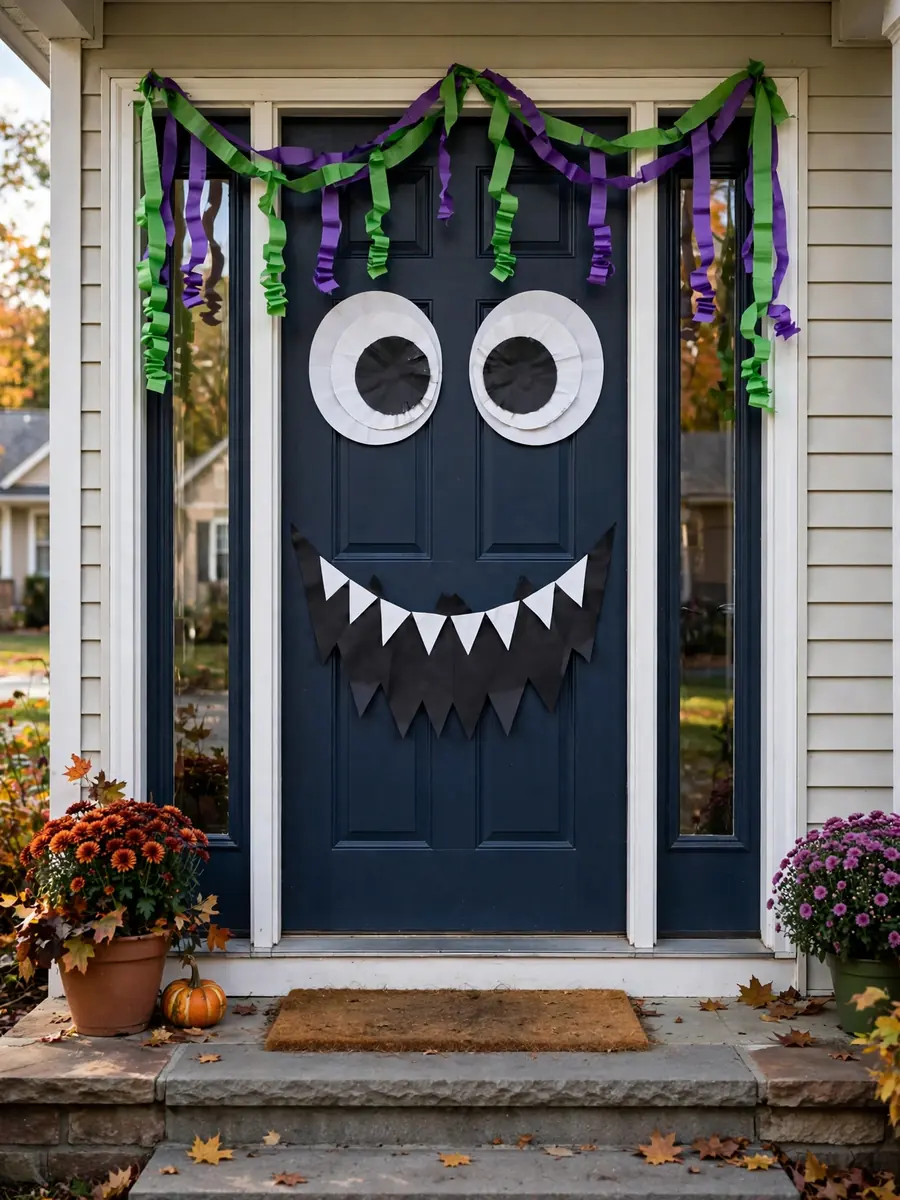
Turn the door into a monster face: big white paper-plate eyes with drawn pupils, a jagged black paper mouth with white cardstock triangle teeth, and purple or green streamers as “hair” across the top. Attach everything with painter’s tape or removable adhesive strips — never staples or nails. Cost: About $6–$10 as of 2026. Rental-safe note: All fasteners come off cleanly with no damage to the door’s finish.
17. Halloween Window Scenes
Cut a haunted-house skyline from black construction paper, tape it low in the window, and fill the sky behind with orange tissue paper. Room light turns the window into a glowing scene at night. Cost: About $5–$8 as of 2026. Rental-safe note: Tape goes on glass only and cleans off with warm water — no wall or trim damage.
Frightful Finishing Touches
Two under-30-minute details that make the display feel finished — the kind neighbors mention.
18. Witch Broom Parking Sign
Paint “Witch Parking — All Others Will Be Toad” on scrap board with outdoor paint, hang it from a broom handle with twine, and lean the broom by the front door. Cost: Free to about $5 as of 2026. Weather-proofing: Keep under the porch overhang or seal with clear outdoor spray so rain doesn’t run the paint.
19. Porch Scarecrow Greeter
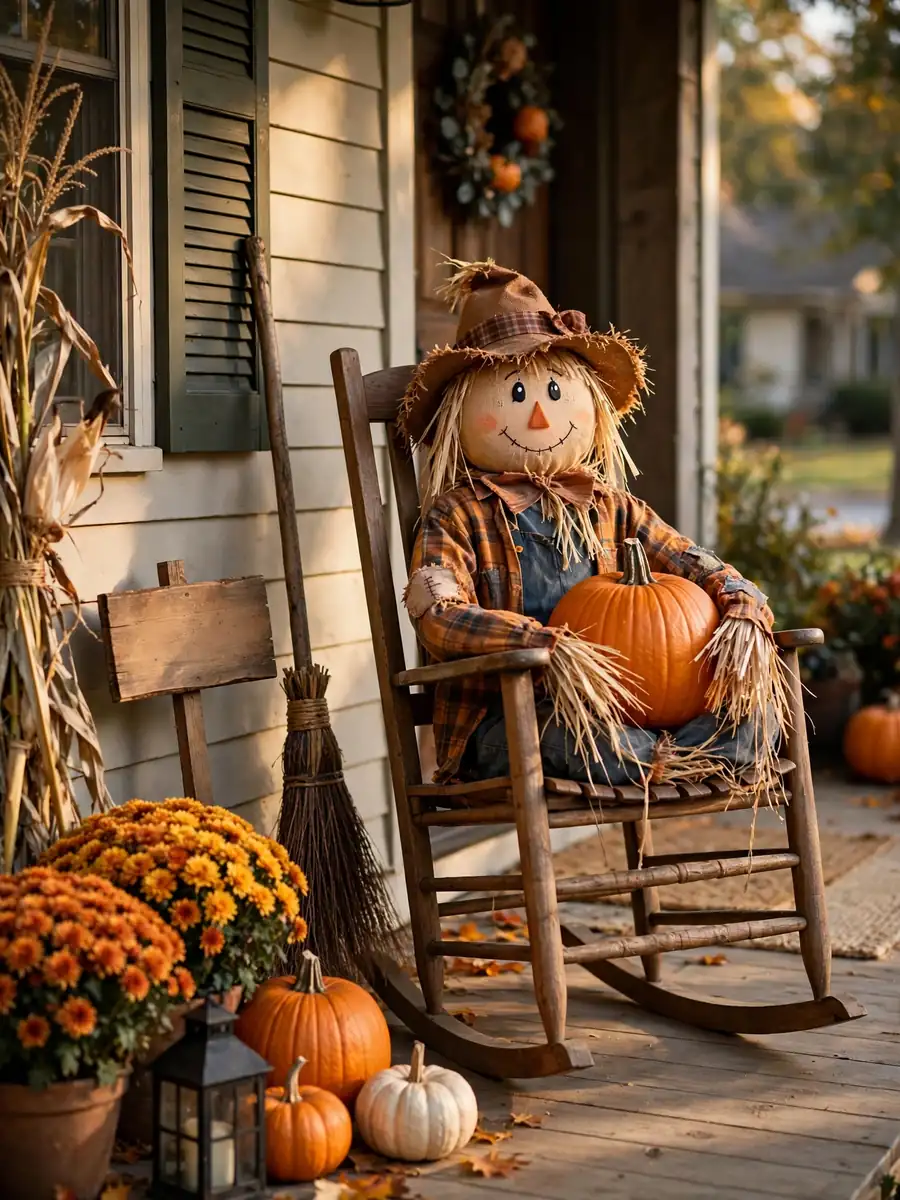
Stuff old clothes with newspaper, tie wrists and ankles with twine, and top with a pillowcase head (drawn face) and straw hat. Seat it in a porch chair with a pumpkin on its lap — seated reads friendlier for young kids. Cost: Free to about $5 as of 2026. Weather-proofing: Move onto the covered porch before rain; wet newspaper stuffing gets heavy and misshapen.
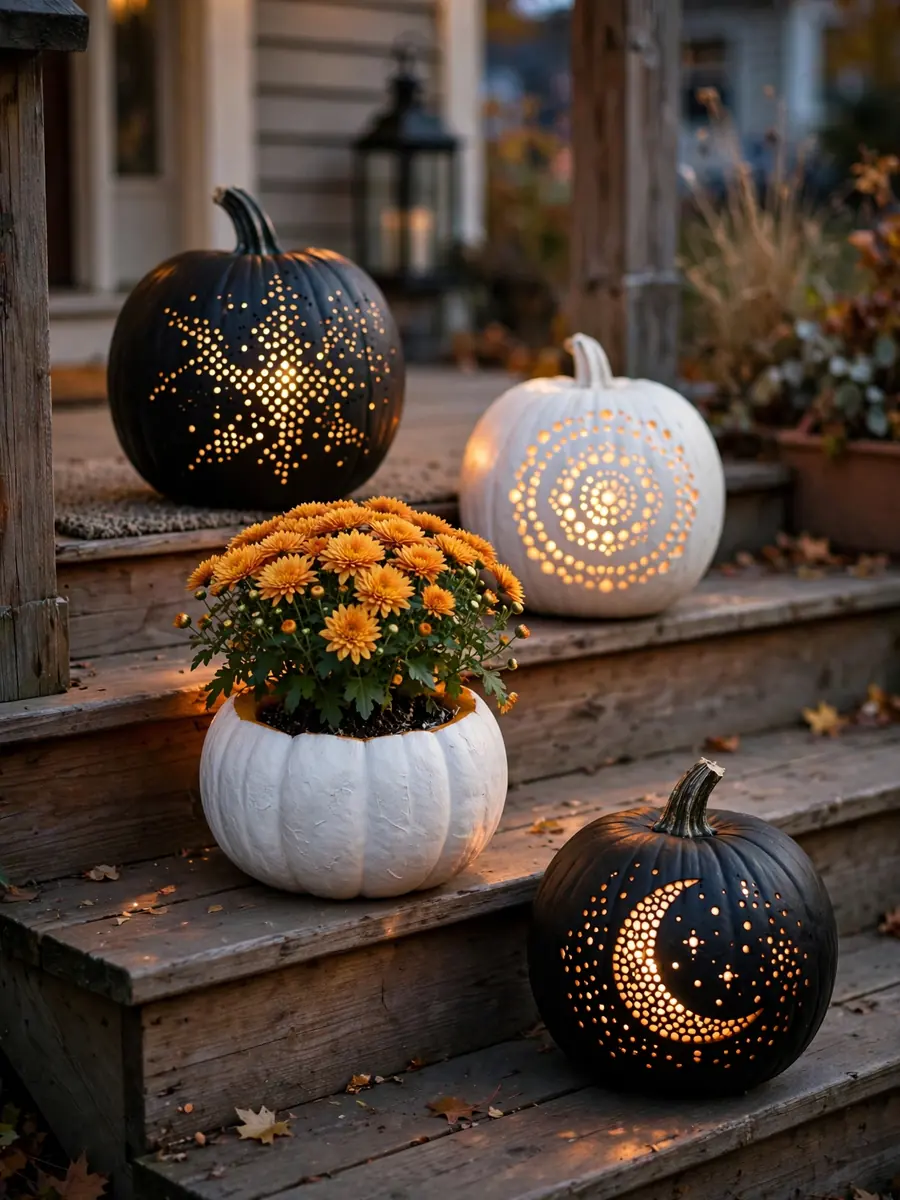
20. Painted and Drilled Pumpkins
For a twist on the no-carve pumpkin, drill patterns of small holes into a painted pumpkin and place a battery tea light inside — the light shines through in dots and constellations. Paint first with outdoor acrylic, let dry, then drill. Cost: About $5–$10 as of 2026. Weather-proofing: Use foam pumpkins for a reusable option; real drilled pumpkins last a couple of weeks in cool weather.
21. Floating Cheesecloth Ghosts on Stakes
For a ghost that hovers at eye level, mount a foam ball on a sturdy garden stake instead of a tomato cage, drape cheesecloth over it, and secure the “neck” with yarn. Cluster three at different heights along the walkway. Cost: About $4–$7 per ghost as of 2026. Weather-proofing: Stake-mounted ghosts stay put in wind better than cage versions; bring them in for heavy storms.
Frequently Asked Questions
How much does it cost to decorate a yard for Halloween?
A full DIY yard like this one typically runs $50–$100 in supplies as of 2026, since most projects reuse free materials like pallets and milk jugs. A single store-bought inflatable often starts around $50 by comparison.
How do I keep Halloween decorations from blowing away?
Anchor everything: push stakes deep, weigh light items with gravel, and use zip ties instead of string for structural pieces. Check anchors after the first windy night — most blow-aways happen because the first setup was only finger-tight.
Are these decorations safe for homes with small kids?
The no-carve pumpkins, painted projects, and fabric ghosts are all kid-friendly. Skip real candles anywhere kids or pets go — battery tea lights give the same glow. Keep heavy builds like the coffin clear of the trick-or-treat path.
What should renters avoid?
Don’t staple, nail, or screw into siding, doors, or trim. Use removable adhesive strips, painter’s tape on glass, and freestanding stakes instead. Each project above notes its rental-safe option where it matters.
How early should I put up outdoor Halloween decorations?
Most people start the first or second weekend of October. Weather-proof builds like painted pumpkins and pallet projects can go up early; paper and cardstock silhouettes last longer if you wait until mid-October.
Can I leave battery lights out in the rain?
Battery tea lights and outdoor-rated string lights handle rain fine, but check the packaging — “indoor only” lights belong on a covered porch. Tip open containers like mason jars after storms so lights don’t sit in pooled water.
Conclusion
A memorable Halloween yard isn’t about spending the most — it’s about layering a few big, simple shapes with warm light. Start with one anchor project like the pallet graveyard or giant spiderweb, add pathway lighting so it all glows at night, and fill in with silhouettes and pumpkin projects.
Build over two weekends, keep everything anchored and battery-lit, and you’ll have a yard that stops traffic for under $100. For more seasonal yard ideas using the same staking and lighting tricks, see our Easter outdoor decoration ideas — and if your ghosts need an audience, our backyard fire pit lounge ideas show how to make the yard a place to linger after dark.
Happy haunting — and happy building.

Thiago Alexander is the Chief Editor at Nested Charm. With a deep passion for interior design and cozy living spaces, he leads the editorial team in crafting stories that make every house feel like a home.
