20 Plastic Pumpkin Makeover Ideas for Pottery, Stone & Vintage Finishes (That Hide the Dollar-Store Look)
Executive Summary
Those bright-orange plastic pumpkins and shiny candy buckets in your fall bin can pass for expensive pottery with one weekend of craft time. The secret is not the paint color — it is the prep. Plastic repels ordinary paint, so a quick wash, a light scuff, and a coat of plastic-bonding primer turn a slick shell into a surface that holds matte, textured, and aged finishes.
Below are 20 numbered makeover ideas grouped by finish: stone and concrete, pottery and ceramic, velvet and fabric, vintage patinas, candy-bucket fixes, and styling tricks. Each idea covers what it is, how to do it, and an approximate cost as of 2026.
In short: Wash, scuff, and prime any plastic pumpkin with a plastic-bonding primer, then build the finish of your choice — stone, pottery, velvet, or aged patina. Most makeovers cost under $15 and take an afternoon.
Start With Prep: Make Paint Actually Stick to Plastic
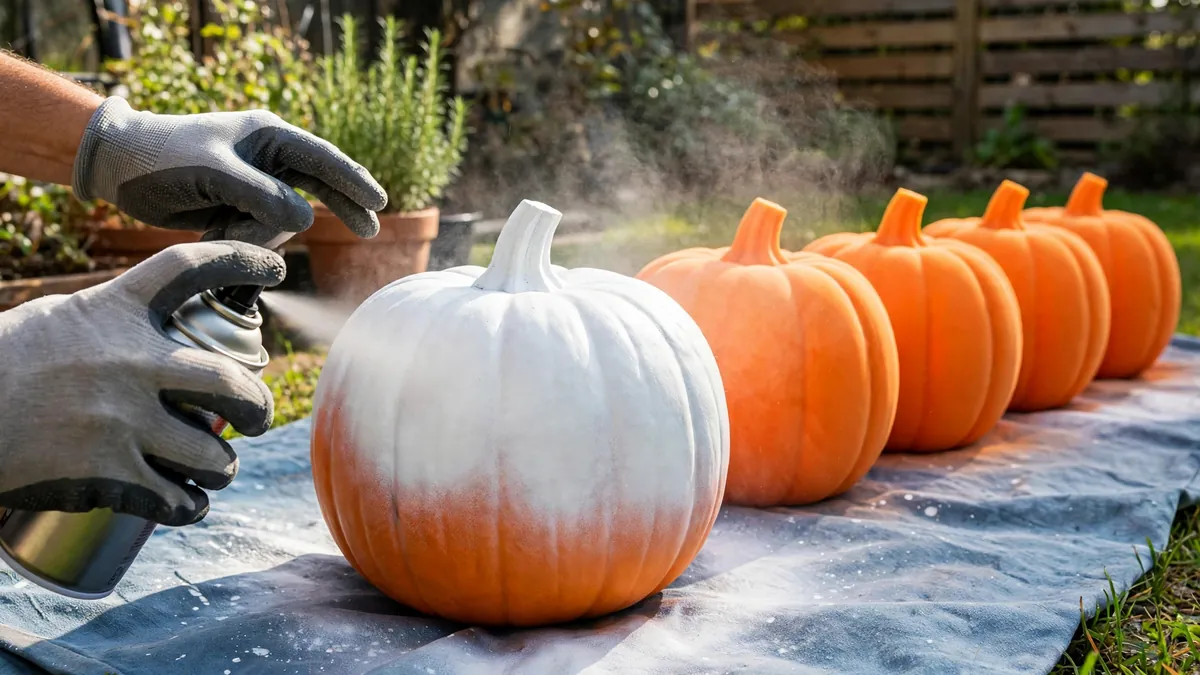
Skip prep and the finish peels off by November; do it and the same pumpkin looks hand-thrown. Budget about 30 minutes of prep for three to five pumpkins.

1. Wash, Degrease, and Dry Thoroughly
What: A clean surface is the foundation every finish below depends on.
How: Wash each pumpkin in warm water with a drop of dish soap, scrubbing off dust, sticker residue, and the oily film many plastic decorations carry. Rinse and dry completely — trapped moisture under primer causes bubbling. Avoid strong solvents like acetone or nail polish remover; they can soften or melt some plastics. Cost: essentially free, as of 2026.
2. Lightly Scuff the Shine Away
What: A quick pass with fine sandpaper gives primer and paint something to grip.
How: Rub the glossy surface all over with 220-grit sandpaper or a fine sanding sponge, just enough to dull the shine. Wipe away dust with a damp cloth and let dry. On thin candy buckets, use a light touch so you do not thin the plastic. Cost: a few dollars for sanding sponges as of 2026; one pack lasts many projects.
3. Seal Everything With a Plastic-Bonding Primer
What: A primer formulated to bond with plastic is the most important supply on this list.
How: Apply one or two thin, even coats of plastic-bonding spray primer, letting each dry per the can’s directions. ⚠️ Risk flag: spray primer and spray paint belong outdoors or in a ventilated garage only, on a drop cloth — overspray drifts and can spot cars, siding, and concrete. The safer alternative is a brush-on plastic primer (slower, no overspray). Cost: roughly $8–$12 per can as of 2026; one can usually covers five to eight pumpkins.
Stone & Concrete Finishes
Stone and concrete looks erase “plastic” most convincingly. Rough texture catches light like carved stone, and matte grays and warm taupes blend into almost any fall palette.

4. Baking-Soda Texture Paint for a Sandy Stone Look
What: Baking soda mixed into acrylic paint creates a gritty texture that reads as weathered stone.
How: Mix about one tablespoon of baking soda into a few tablespoons of matte acrylic paint in a stone tone (warm gray, greige, or sand). Dab it on with a stiff brush or sponge — dabbing builds texture; brushing flattens it. Add a second coat once dry. Cost: acrylic craft paint is usually $1–$3 a bottle and baking soda costs pennies, so plan on under $5 total as of 2026.
5. Stone-Texture Spray for a Cast-Concrete Finish
What: Textured spray paint designed to mimic stone gives the fastest faux-concrete result.
How: Over the primed pumpkin, apply light, sweeping coats of stone-texture spray in concrete gray, holding the can 10–12 inches away. Several light passes build a realistic flecked surface; one heavy pass looks lumpy. Seal with clear matte sealer if the pumpkins will sit outside. ⚠️ Risk flag: spray outdoors only, on a drop cloth, away from anything you do not want speckled. Cost: roughly $10–$14 per can as of 2026, enough for several pumpkins.
6. Dry-Brush for Carved-Stone Depth
What: Dry-brushing adds highlights that make a flat gray finish look carved.
How: Paint the primed pumpkin a mid-tone gray and let it dry fully. Dip a dry stiff brush in a lighter gray, wipe nearly all of it off on a paper towel, then drag it lightly over the ridges so only raised areas catch the light. For deeper grooves, work a thinned dark wash into the crevices first. Ribbed pumpkins take this technique especially well. Cost: uses the same paint from idea 4, so often $0 extra as of 2026.
Pottery & Ceramic Looks
Matte, earthy, and hand-shaped-looking — pottery finishes turn plastic pumpkins into pieces that can sit beside real ceramics without giving themselves away.

7. Matte Color-Blocking for Modern Stoneware
What: Solid matte colors in clay, cream, and sage mimic contemporary stoneware.
How: Brush two coats of matte acrylic or chalk-style paint in earthy tones over the primer, keeping strokes in one direction for an even finish. Avoid metallic or satin paints — the matte surface sells the ceramic illusion. Some craft-store pumpkins already have a matte white base and can skip straight to color. Cost: roughly $2–$5 per pumpkin in paint as of 2026.
8. A Glaze Wash for a Fired-Ceramic Sheen
What: A thin, translucent wash over a matte base imitates the subtle sheen of glazed pottery.
How: Paint your base color and let it dry. Mix a slightly darker tone with water (about one part paint to three parts water), brush it on, and wipe back the excess with a soft cloth so color settles into the crevices. A thin coat of clear matte or satin sealer adds the faint glow of real glaze. Cost: usually $0 extra if you already own the paint and sealer, as of 2026.
9. A Hand-Painted Band for Artisan Pottery
What: A single painted stripe around the pumpkin’s middle reads as a hand-thrown potter’s detail.
How: Once the base coat dries, mark a band around the widest point with painter’s tape, following a natural rib as a guide. Paint it in a contrasting clay tone — terracotta on cream, charcoal on oatmeal — then peel the tape while the paint is still slightly tacky for a crisp edge. Slight wobbles help; perfectly straight lines can look printed. Cost: under $5 for tape and a small bottle of accent paint as of 2026.
Velvet & Fabric Finishes
When paint will not do, cover the plastic entirely. Fabric finishes look expensive, photograph beautifully, and need no primer at all.
10. Stretch-Velvet Wrap for a Plush Pumpkin
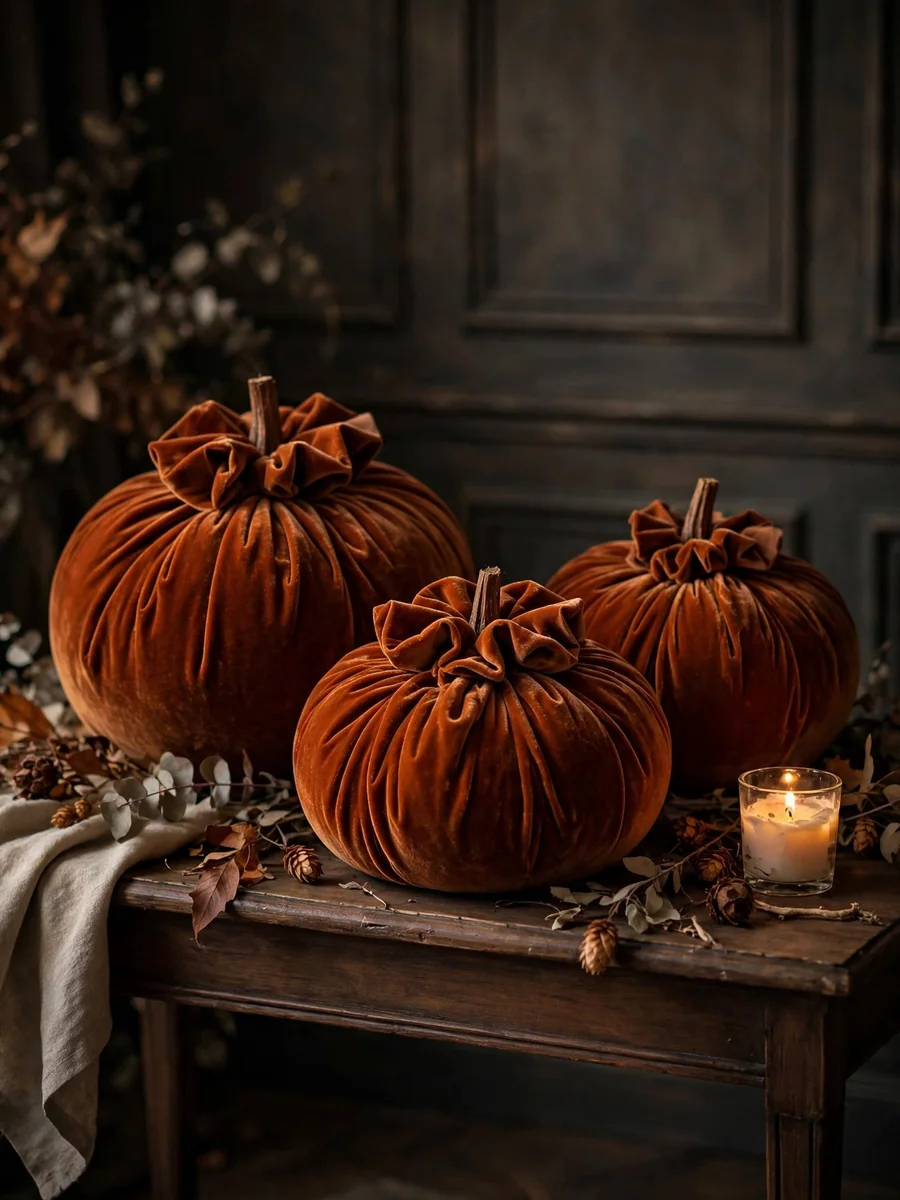
What: Wrapping the pumpkin in stretch velvet hides the plastic completely and gives a soft, gathered look.
How: Cut a circle of stretch velvet about twice the pumpkin’s diameter, place the pumpkin in the center, gather the fabric around the stem, and secure it underneath with a rubber band or a few stitches. Trim the excess, then hot-glue a short wooden dowel or real twig in as the stem. ⚠️ Risk flag: hot glue can bubble a painted finish applied directly to paint — but on fabric wraps the plastic is already covered, so this is one of its safer uses. Cost: velvet remnants are usually $3–$8 per pumpkin’s worth as of 2026.
11. A Flocked “Velvet-Illusion” Spray Finish
What: Flocking spray fibers give a short-nap, suede-like surface with no sewing or wrapping.
How: Prime as usual, then apply flocking or velvet-finish spray in an even coat, keeping the can moving to avoid clumps. It works best on smaller pumpkins where the fine texture reads clearly. Let it cure fully — usually 24 hours — before much handling, since fibers can shed at first. Cost: roughly $10–$15 per can as of 2026, covering three to four small pumpkins.
12. Fabric-Strip Wrapping for a Harvest Look
What: Spiraling strips of linen or burlap around the pumpkin creates a rustic wrapped-harvest texture.
How: Cut fabric into 1–2 inch strips. Starting at the bottom, wrap the pumpkin in overlapping spirals, securing each strip with a dab of fabric glue or a low-temp glue gun at the top and bottom only. Tuck the ends under the stem. Natural linen and burlap look best; shiny satin reads as plastic again. Cost: roughly $2–$4 per pumpkin in fabric strips as of 2026.
Vintage & Aged-Patina Techniques
Aged finishes forgive every imperfection — perfect for beginners and for pumpkins with dings from years in the decor bin.
13. Dark Antiquing Wax for Instant Age
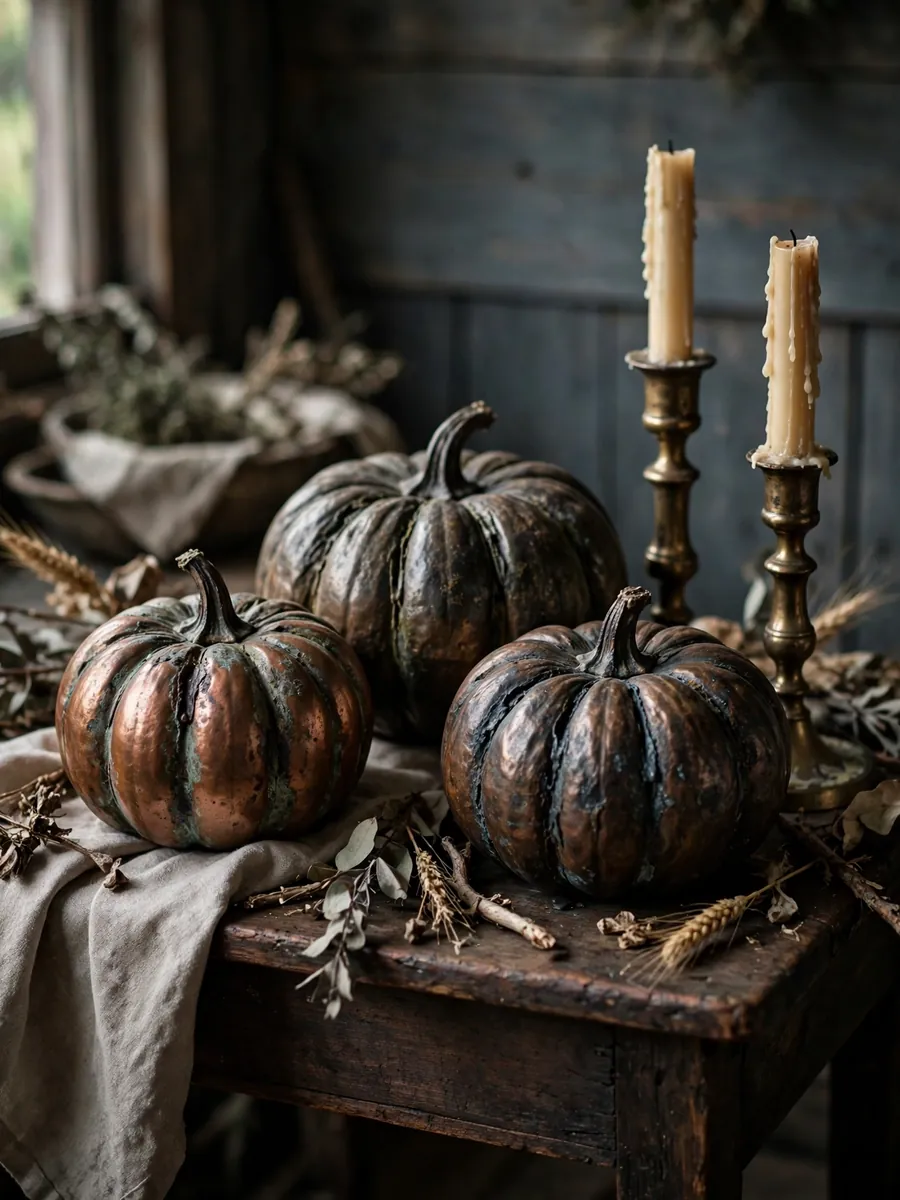
What: Rubbing dark wax into crevices makes a painted pumpkin look decades old in minutes.
How: Paint the pumpkin a light base (cream, pale gold, or sage) and let it dry. Rub dark antiquing wax over the surface with a soft cloth, then buff the high points back so wax settles mainly in the grooves. Work in small sections so the wax does not dry before you buff it. Cost: roughly $8–$12 for a tin of wax as of 2026, which lasts for dozens of pumpkins.
14. Two-Step Crackle for a Cracked-Glaze Antique
What: Crackle medium creates fine cracks in the top coat, imitating old glazed ceramics.
How: Paint a darker base coat and let it dry. Brush on crackle medium per its directions, then — while still tacky — brush a lighter top coat over it in one direction. Fine cracks open as it dries, revealing the dark base beneath. Do not overbrush; going back over an area collapses the cracks. Cost: roughly $8–$10 for a bottle of crackle medium as of 2026.
15. Napkin Decoupage for Vintage Botanical Prints
What: Decoupaging floral or botanical napkins onto the pumpkin gives a vintage-china look.
How: Separate the printed top layer of a paper napkin. Brush thin decoupage medium onto a section of the primed pumpkin, lay the napkin down, and smooth it from the center outward with a soft brush — pressing hard tears it. Overlap pieces to cover the surface, then seal with two thin top coats. Small-scale prints work best; large motifs wrinkle around curves. Cost: roughly $3–$5 for napkins plus $8–$10 for decoupage medium as of 2026.
Candy Bucket Makeovers
Candy buckets are the hardest to disguise — glossy, molded seams, wire handles. These two ideas address the bucket specifically.

16. Remove the Handle, Fill the Holes, Lose the Shine
What: De-handling a candy bucket is what finally stops it reading as a trick-or-treat pail.
How: Pop the wire handle out of its side slots (most lift out with a firm twist). Fill the small holes and skim the molded side seams with all-purpose filler, then sand smooth when dry. Prime with plastic-bonding primer and finish with any matte technique above — stone gray is especially convincing on buckets. ⚠️ Risk flag: filler shrinks as it dries, so apply it slightly proud and do a second thin pass rather than one thick blob, which can crack. Cost: roughly $5–$8 for a small tub of filler as of 2026.
17. Turn Buckets Into a Stacked Pumpkin Topiary
What: Stacking two or three finished buckets makes a topiary that looks store-bought.
How: Make over two or three buckets in the same finish — matte cream with a terracotta band looks classic. Stack them largest to smallest, securing each with strong craft adhesive or a wooden dowel through the centers. Set the stack in a weighted urn or basket, tucking dried moss or faux greenery around the base to hide the joins. Flanks a front door beautifully. Cost: adhesive and a dowel usually run $5–$8 as of 2026, plus buckets you already own.
Style Them Like a Store Display
The makeover only pays off if the styling sells it. These finishing moves make budget pumpkins look intentional instead of crafty.

18. Group in Odd Numbers With Varied Heights
What: Odd-numbered groupings with height variation look designed; matched pairs look mass-produced.
How: Cluster three or five pumpkins of different sizes and finishes — one stone gray, one cream pottery, one velvet rust — tallest at the back. Keep finishes within a tight color palette so the group feels curated. Step back and squint: if one pumpkin pops out as obviously plastic, it needs another coat. Cost: $0, as of 2026.
19. Pair With Natural Textures
What: Wood, wheat, linen, and greenery make matte finishes read as expensive by contrast.
How: Set finished pumpkins on a wooden tray, tuck dried wheat or eucalyptus stems behind them, and lay a linen runner underneath. Natural materials give the eye a “real materials” context, so faux stone and pottery blend right in. If you are planning a full-room look, our indoor Halloween decor ideas show how neutral pumpkin groupings fit into whole-space styling. Cost: dried stems and a runner are usually $5–$15 as of 2026.
20. Light Them With Battery Candles, Never Flame
What: A warm glow beside a makeover pumpkin makes the finish look rich after dark.
How: Place battery-operated tea lights or fairy lights beside your finished pumpkins — low warm light deepens matte textures and makes patinas glow. Never put a real flame candle inside a plastic pumpkin; the heat can warp or melt the plastic and paint, and it is a fire risk. For porch displays, check our fall front porch decor ideas for weather-safe lighting setups. Cost: battery tea lights are usually a few dollars for a multi-pack as of 2026.
FAQ
Will regular acrylic paint stick to plastic pumpkins?
Not on its own — it usually scratches or peels within days. Wash, lightly scuff, and prime with a plastic-bonding primer first (ideas 1–3), and the same paint will hold for seasons.
Can I use spray paint on plastic pumpkins?
Yes, if it is a spray formulated to bond with plastic, applied over a scuffed, clean surface. Always spray outdoors or in a ventilated garage on a drop cloth, because overspray drifts and stains.
How do I get rid of the shiny seams on candy buckets?
Sand the molded seams lightly, fill handle holes with all-purpose filler, sand smooth, and prime. The seam disappears under a matte stone or pottery finish (see idea 16).
Will my makeover pumpkins survive rain on the porch?
Usually, if you finish with a clear matte or satin sealer and keep them on a covered porch. Unsealed acrylic paint softens in sustained rain, so seal anything that will see weather — and bring fabric-wrapped pumpkins (ideas 10–12) indoors when it rains.
How long does a plastic pumpkin makeover take?
Plan on an afternoon: about 30 minutes of prep, an hour or two of painting with drying time between coats, and 24 hours of cure time before heavy handling. Fabric wraps (ideas 10 and 12) are fastest — often under an hour.
Can I still use a painted pumpkin as a candy bucket?
Yes — paint only the outside and leave the interior as-is, or line it with a small bag so candy never touches the painted surface. Craft paint is not food-safe, so keep treats separated from any painted area.
Conclusion
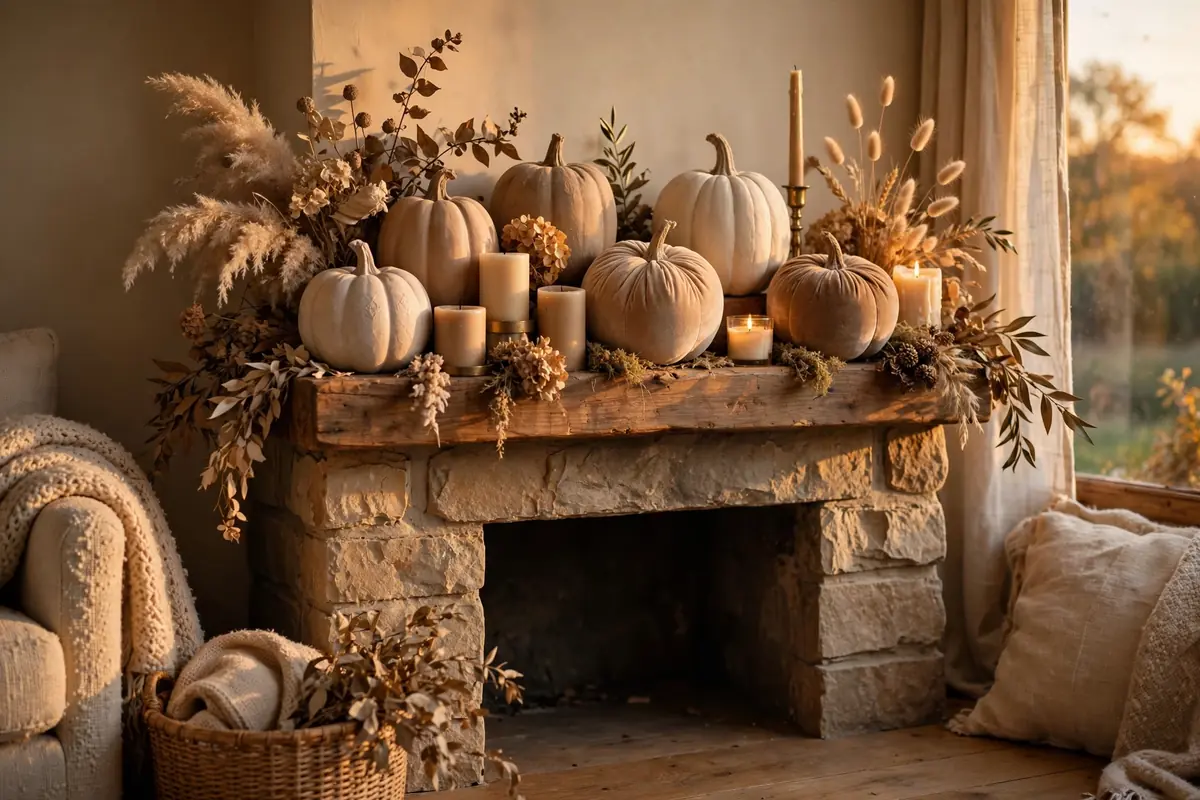
A plastic pumpkin makeover is one of the highest-return budget crafts in fall decorating: the raw materials cost a few dollars, the techniques are forgiving, and the finished pieces genuinely pass as pottery, stone, or vintage finds once prepped and styled right. Start with one batch this weekend — wash, scuff, prime, then pick the finish that matches your home, from rough concrete gray to warm matte clay to plush velvet.
Store finished pumpkins in a dry bin with tissue between them and they will come back out next fall looking just as good, ready for a new grouping or a fresh topiary. That is the real win: decorations you already owned, upgraded once, enjoyed for years.

Thiago Alexander is the Chief Editor at Nested Charm. With a deep passion for interior design and cozy living spaces, he leads the editorial team in crafting stories that make every house feel like a home.